How to Condition and Moisturize Leather Boots at Home
If your leather boots are starting to look a little dull, feel stiff, or show fine lines where they flex, they’re not ageing — they’re thirsty.
Knowing how to condition and moisturise leather boots at home is one of the highest-impact things you can do for your footwear, and it takes less than fifteen minutes from start to finish.

Leather is a natural material that loses its oils continuously through wear, heat, and exposure to the elements. Without regular conditioning, that process ends in cracking, splitting, and a pair of boots that looks ten years older than it should.
The good news is that the fix is simple, satisfying, and completely doable with products you can find at any shoe care aisle or online.

The short version:
- Clean your boots thoroughly before conditioning — product applied over dirt gets sealed in, not absorbed.
- Let boots dry completely if they’ve been wet or freshly cleaned before applying conditioner.
- Apply a small amount of leather conditioner with a soft cloth using circular motions, covering the entire upper.
- Let the conditioner absorb for at least 15–20 minutes before buffing off any excess.
- Repeat every 4–6 weeks for regularly worn boots, or any time the leather looks or feels dry.
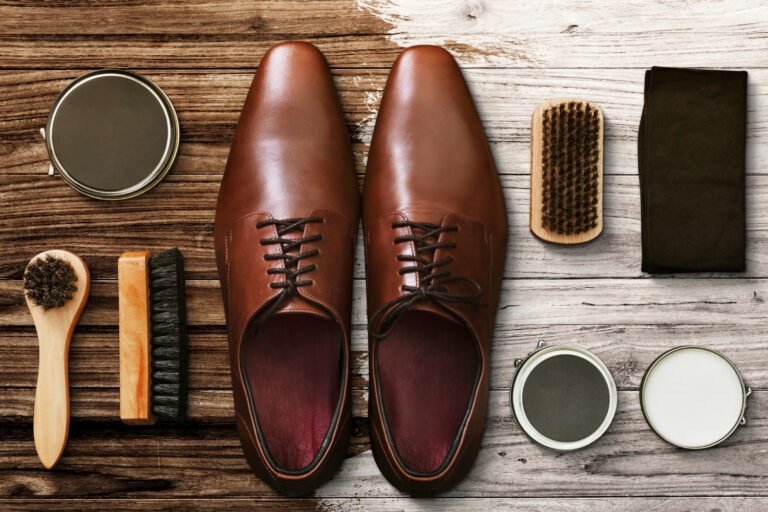
What You’ll Need
- A dedicated leather conditioner or leather cream (beeswax-based or lanolin-based both work well)
- A soft lint-free cloth or microfibre cloth (two — one to apply, one to buff)
- A soft horsehair brush or old toothbrush (for seams and textured areas)
- A leather cleaner or very lightly damp cloth for the pre-conditioning clean
- Cedar shoe trees or newspaper for stuffing
- Good lighting — it helps you spot dry patches and missed areas
Step-by-Step Instructions
Step 1: Clean Your Boots Before You Start
Conditioning leather over a layer of dirt, dust, or old product is one of the most common mistakes in shoe care, and it’s completely avoidable.
The conditioner sits on top of whatever’s already on the surface rather than penetrating the leather, which means your boots look temporarily better, but the leather itself isn’t actually getting what it needs.
Wipe the entire boot down with a slightly damp cloth to remove surface dust, or use a dedicated leather cleaner if there’s more significant grime, salt residue, or dried mud present.

Let the boot dry fully before moving on — conditioning damp leather can cause uneven absorption and, in some cases, watermarking.
Step 2: Stuff Your Boots to Create a Firm Surface
Insert cedar shoe trees or pack the boots firmly with newspaper before you start applying product.
This does two things: it holds the boot in its natural shape so you can work the conditioner evenly into all the surfaces, including the toe and heel areas that tend to fold or collapse when you’re working on them, and it helps the leather absorb the conditioner more evenly by keeping it taut rather than bunched.
For tall boots, rolled magazines or a boot tree that extends up the shaft work far better than newspaper alone, which can leave the upper half of the shaft unsupported and awkward to treat properly.
Quick tip: Work in a spot with good lighting — natural light is ideal. It makes dry patches, missed seams, and areas that need extra attention much easier to spot before the conditioner dries and the opportunity passes.
Step 3: Choose the Right Conditioner for Your Leather
Not all leather conditioners are the same, and the wrong product on the wrong leather can darken the colour or leave a greasy residue that attracts dust. For smooth, polished leather boots, a beeswax-based cream conditioner or a lanolin conditioner gives excellent results — both penetrate the leather and restore its natural oils without altering the finish significantly.
For matte or unfinished leather, a lighter oil-based conditioner is better. For suede or nubuck, stop here — these materials need a completely different care routine and should never be treated with standard leather conditioner.
If you’re unsure about your boots’ specific leather type, test any new product on the inner heel or a hidden area first and wait ten minutes before proceeding.
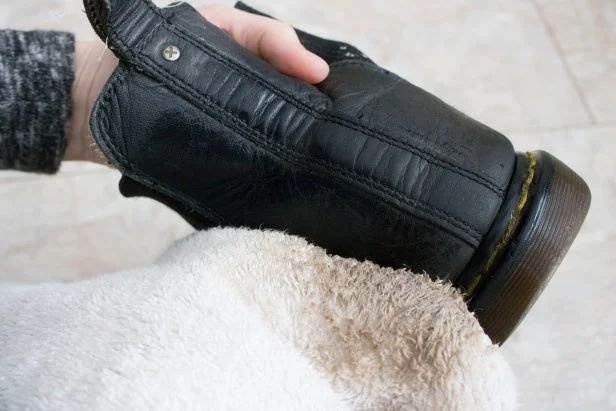
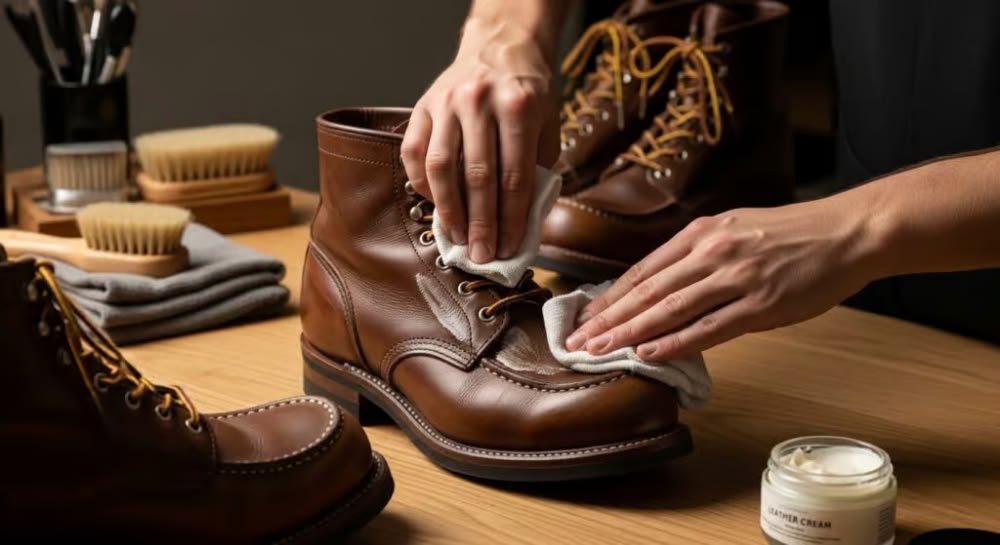
Step 4: Apply Conditioner and Moisturize Leather Boots Using Circular Motions
Scoop or squeeze a small, pea-sized amount of conditioner onto your cloth — less than you think you need is the right starting point. Apply it to the leather in small circular motions, working systematically from one end of the boot to the other.
Start at the toe box, move along the vamp, up the sides, across the heel, then up the shaft. Circular motions work the product into the grain of the leather rather than just coating the surface.
Use the horsehair brush or an old toothbrush along any seams, around the welt where the upper meets the sole, and in any textured areas where a cloth can’t fully reach. These are the spots that tend to dry out fastest and crack first.
Step 5: Let It Absorb, Then Buff Off Any Excess
Once you’ve worked conditioner over the entire boot, set them aside for at least 15–20 minutes — longer if the leather was particularly dry and is drinking the product in quickly. This absorption time is when the actual conditioning happens; wiping the product off immediately defeats the purpose.
After the resting period, use a fresh clean cloth to gently buff off any excess conditioner still sitting on the surface. A little remaining residue is fine and will continue to absorb; a heavy layer left on the surface can turn tacky, attract dust, or clog the leather’s pores over time. Finish with a light buffing using a horsehair brush for a subtle natural sheen.
Step 6: Allow to Dry Fully Before Wearing or Storing
Leave your freshly conditioned boots in a ventilated spot at room temperature for at least an hour — ideally a few hours — before wearing them or putting them away. Conditioned leather needs time to fully absorb the product and stabilise before it’s subjected to the flexing and friction of wearing.
Putting them straight into a closed wardrobe traps the residual oils before they’ve fully absorbed. I once conditioned a beautiful pair of cognac leather boots and immediately stored them in their box — they came out two weeks later with a slight tackiness on the surface that took another round of care to sort out. Patience, as always with leather, is worth it.
Common Mistakes to Avoid
- Conditioning without cleaning first. Product layered over dirt and dust gets sealed into the leather. Always clean before you condition — no exceptions.
- Using too much conditioner. More is not more with leather care. Over-conditioning can clog the leather’s pores, darken the colour permanently, and leave a greasy surface that attracts dust and dirt.
- Using the wrong product for your leather type. Smooth leather conditioner on suede is a disaster. Always check the label and test on a hidden spot when trying a new product.
- Conditioning wet leather. Leather that’s damp from rain or cleaning absorbs unevenly, which can cause patchy darkening or watermarks. Always allow full drying first.
- Skipping the seams and welt. The areas where leather meets leather — and where the upper meets the sole — dry out fastest. These are the areas most likely to crack if conditioning is rushed or incomplete.
How to Keep Leather Boots Conditioned Year-Round
- Set a schedule and stick to it. Every 4–6 weeks for boots you wear regularly; before and after the winter season for boots that are stored for part of the year. Calendar reminders are not embarrassing — they’re practical.
- Condition after every time boots get wet. Rain, puddles, and snow draw the oils out of leather far faster than normal wear. A conditioning treatment after drying is essential, not optional.
- Store boots with cedar shoe trees in place. Cedar absorbs moisture between wears and keeps the leather from drying out during storage, which reduces the amount of work each conditioning session has to do.
- Keep boots out of direct sunlight and heat sources. Both accelerate the drying out of leather. A cool, ventilated, shaded spot is the ideal storage environment.
- Check your boots regularly, not just when you notice a problem. Run your hand over the leather every few weeks — if it feels even slightly rough, papery, or stiff, it’s time to condition. Don’t wait for visible cracking to start.
FAQ
How often should I condition and moisturize leather boots at home? Every 4–6 weeks for boots in regular rotation. For boots stored seasonally, condition them before storing and again when you take them out at the start of the season. If your boots are exposed to rain or salt frequently during winter, condition them after each significant soaking rather than waiting for the scheduled interval.
What’s the best leather conditioner for boots at home? Beeswax-based conditioners (like Saphir Médaille d’Or Crème Universelle or Leather Honey) and lanolin-based conditioners both give excellent results on smooth leather. For everyday use, even a basic leather conditioner from a shoe care brand works well. The most important thing is using something regularly rather than finding the perfect product and using it never.
Can I use olive oil or coconut oil to condition leather boots? In a pinch, natural oils can provide temporary moisture — but they’re not ideal long-term. Olive oil can go rancid inside the leather over time, causing an unpleasant smell and potentially weakening the fibres. Coconut oil can clog leather pores and cause darkening that’s difficult to reverse. A proper leather conditioner is genuinely worth the small investment.
How do I know if my leather boots need conditioning? Rub your thumb firmly across the leather surface. If it feels smooth and slightly supple, you’re fine. If it feels dry, slightly rough, or papery — or if the leather has lost its sheen and looks dull even after wiping — it needs conditioning. Visible fine lines forming in the grain where the boot flexes are a more urgent sign that conditioning is overdue.
Final Thoughts
Conditioning your leather boots at home is one of those shoe care rituals that takes almost no time once you’re in the habit — and the difference it makes to how long your boots last and how good they look is genuinely dramatic. Fifteen minutes every month or so is the difference between boots that crack and fade after two seasons and boots that soften and improve over years of wear. That’s a pretty good return on fifteen minutes. Bookmark this guide and come back to it every time your boots start looking like they need a drink.
Read also: